In 2017, a team of scientists used a transmission polariscope to measure optical retardation as a red LED passed through Prince Rupert’s Drop. Crazy, right? I pretty much copy and pasted that from wikipedia cause it had smart words. I have to get you into the science mood after all.
Prince Rupert’s Drop is quite fascinating. It is nearly bullet proof and dare I say, indestructible. But! It has an achilles heel, the tail. If the tail is broken, the entire thing literally explodes. For real, it’s cool. What does this have to do with flies? I’m really glad you asked. Basically, internal structure of a Prince Rupert’s Drop is constantly under a state of tension. The outside compressive stress is around 100,000psi. The application into fly tying is not as great as far as pressure and tension (or material for that matter), but we can take the basic principal and apply it here by applying differing tensions from the inside out.
It seems really silly to take something this complex and use it in a situation such as tying. One thing I have always been a proponent of is simplicity and bullet-proofing in fly tying. Basically, I roll with like one fly and if it can’t hold up to a hundred fish, bummer dude. In the past, I have played with epoxy and glue and things meant to travel into space. I missed basic design and found that materials that are under a constant state of tension will withstand the most abuse. Now, we can’t just start heating and cooling flies to create a bullet proof drop, but we can utilize different materials and technique to emulate those same tensions.
Enter the woolly bugger. The most destructive and most easily destroyed fly that I know of (aside from Dahlberg Divers, but that’s a different story altogether). The most major issue for the bugger is the gosh darn hackle. Scrap it. The last thing you need is a point of failure. Secondly, chenille, scrap that too. Literally anything that fails to hold tension or create it should be tossed out the window. Wire also fails to create tension as does marabou. But wait… Can we create tension with marabou!? That is rhetorical, you can’t really answer that cause it is essentially the topic of this post. Just read on…
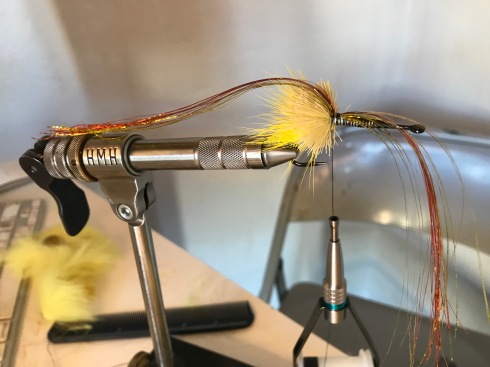
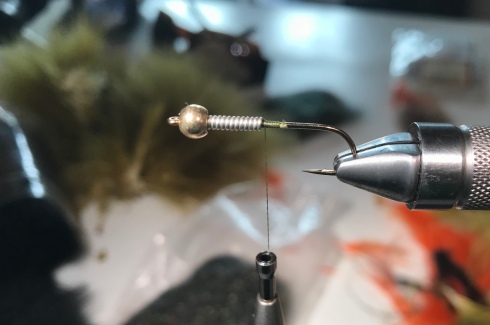
Step 1: Start your bugger as you normally would. I use a 6/0 Veevus thread. You do not want a stranded thread in this case. Use strong round stuff. Nothing that lays flat. I wrapped a #8 hook with .025 lead free round wire. You can use lead too, but that is on you. I am not the one polluting the environment. 😉
Step 2: Marabou. I like to stack two feathers for a more fluffy tail. However, this is dangerous as it can add too much torque to the thread wrapped around the hook shank and can come undone from the back. Countermeasures are involved here.

Step 3: 6-7 wraps from the tie-in point to the eye is good, cut off the marabou and clean up the extra fuzzies with thread. Tying in the cut off ends will add rigidity to the center of the marabou and will make it harder to twist. Tie back to the original tie-in point. Your thread should be between the point of the hook and the barb. Trust me, it is important.
Step 4: (this isn’t really a step, but I have a theme going here) The top marabou should not have a stiff quill. Find one that is soft and will flex. I like to buy them in 1-ounce packs to get what I want. The quill on the left is rigid and will shatter and the fly will fall apart from the inside out. Use one like shown on the right.
Step 5: Tie your marabou in from the back toward the eye just to where your thread ramps down from the marabou underneath. This is your countermeasure. It will hold the marabou further away, opposing any torque applied to the fly. Essentially, the longer the tie in point with multiple fibers, the more torque is required to loosen it. Such is the case with Clousers, the top tie-in of bucktail always comes loose first.

Step 6: Advance your thread to the back of the bead leaving the marabou in place. Don’t you trim it! It is the entire purpose of this post!
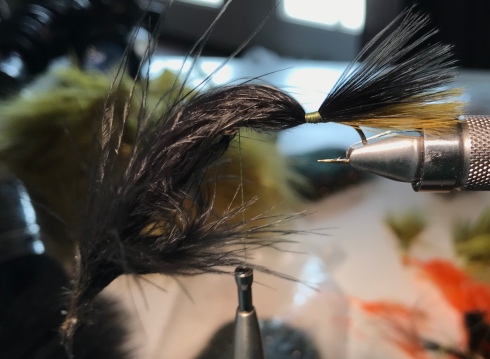
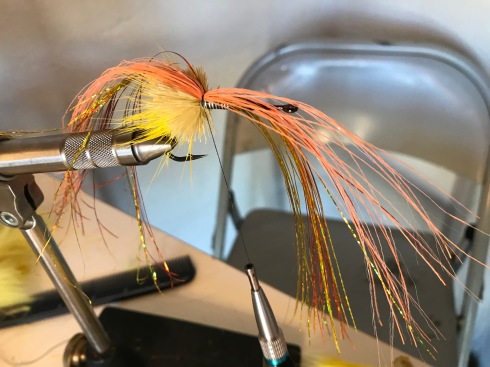
Step 7: Twist the marabou tightly and wrap the hook with it. If the tail becomes loose, you did it wrong. Untie and put more thread tension on the tail. We are creating tension by twisting the marabou to a point that it is in a constant state of tension. Not only is it pulling against itself, but it is also pulling against the thread. It wants to be in a natural position of rest and when you force it into a position in this manner, it is always pulling on something. This act retains tension upon materials like thread that loosen by elongation. Keep in mind that you’ll want to wrap the marabou in the same direction as the thread. However, over time the materials eventually become forced into a state of rest as they will develop what looks like line memory as they stretch and set.

Step 7: Clean up the marabou and throw some flash in that tail. It matters not what flash, pick your favorite. I just use your standard dyed pearl flash for this. I just fold one strand in half to give two little flashy guys on either side by using the loop to rotate the flat to the opposing side of the hook. You’ll just cut that loop off at length and boom, done. No, not with the whole fly, but you are halfway there!
Step 8: Typically, I’ll use that piece of scrap flash to wrap the fly, but in this case we are aiming for bombproof. Any elastic material will do here. I am in love with stretch tubing for this purpose. It makes an excellent replacement to wire, especially with brittle materials like pheasant tails and peacock. Disregard how messy your fly is at this point, we are about to clean it up.

Step 9: Dub! This is just a coating for the fly, the only thing it does is add a little bulk. It is the metaphoric icing on the cake. I mix ice dub and some natural hair like goat or at least a finer dubbing material to bind the ice dub a little better. It turns out similar to laser dub, just chunkier. Try not to pile the dubbing on, just coat the fly and fill gaps. Its ok, as this fly catches fish, it catches more fish.
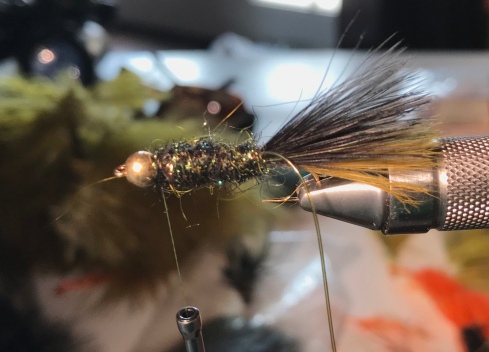
Step 10: Wrap the stretch tubing and make a collar to compress the materials behind the bead. It helps to center the bead and keep it from spinning.

Step 11: Touch up with a little more dub and whip finish. That is all. Now you are done. Go fish.

This fly has bagged, trout, bass, pike, musky, carp, crappie, bluegill, sunfish etc… It really does outperform its hackled brethren. I’ve caught some 3lb+ smallmouth on this too, so it can be effective for large fish as well. Go tie some!!!